Since its 1963 debut in The Pillsbury Family Cook Book, our cherry pie recipe has been a cherished family tradition. Originally featuring a homemade crust and fresh sour cherry filling, this classic recipe has evolved to meet modern needs. In the 1998 Pillsbury Best Desserts cookbook, we introduced using convenient refrigerated pie crust. Now, our simplified 4-ingredient version uses pre-made cherry pie filling and adds a sugary sparkle to the top crust, making it easier than ever to enjoy this timeless dessert.
A basic cherry pie is the beloved choice for holidays and special occasions—particularly the Fourth of July, Thanksgiving, and Christmas—when its vibrant red filling adds a festive touch. Simple, delicious, and always a crowd-pleaser, this cherry pie remains a year-round favorite.
Recipe Ingredients
Just a few simple ingredients are all you need to make this sweet and delicious cherry pie--truly the best cherry pie recipe you'll ever try.
Pie Crusts: One of our favorite products is refrigerated Pillsbury™ Pie Crusts. They’re easy to use, bake up super flaky, and give your cherry pie recipe a homemade taste. If you'd like to make a crust from scratch, check out our scratch pie crust how to.
Canned Cherry Pie Filling: For ease and delicious flavor, we recommend using canned cherry pie filling. The cherries are picked at their peak ripeness, and the pitting and glazing are already done for you. For a richer, gooier pie, use regular cherry pie filling; for a pie with more cherries and less glaze, choose a "more fruit" variety. Both work perfectly in this recipe.
Other Ingredients You’ll Need: Milk and sugar.
Cookware You’ll Need
Here’s the cookware you’ll need to make this easy cherry pie recipe with just a few basic tools.
9-inch Glass Pie Plate: We've tested different options and recommend a heat-resistant glass pie plate for optimal browning and a flaky crust. A ceramic pie dish will also work as it performs similarly to glass.
Pastry Brush: A pastry brush is ideal for applying milk to the crust for a golden-brown finish. Alternatively, you can use a clean paper towel or your fingers.
Other Cookware You’ll Need: Can opener, mixing spoon, spatula, measuring spoon, small prep bowls, small knife, cooling rack.
How to Make Cherry Pie
Here’s how to make the best cherry pie recipe.
1. Prep the Pie Crust
Soften pie crusts by leaving on the counter for 15 minutes to prevent cracking. Unroll and press firmly into bottom and up sides of pie plate.
2. Add the Cherry Filling
Spoon two cans of cherry pie filling into the crust, scraping out any extra glaze.
3. Top, Seal, and Crimp the Crust
Place second crust on top, folding the edge under the bottom crust and pressing to seal. Crimp or flute the edge by pinching the raised edge between thumb and forefinger.
4. Create the Crunchy Top
Brush with milk and sprinkle with sugar (or cream and sparkling sugar) before baking. Cut slits for steam to escape.
5. Bake and Enjoy
Place large piece of foil on lower oven rack to catch juices. Bake pie uncovered; then, cover edge with foil to prevent overbrowning. Pie is done when crust is golden brown. Cool completely to set filling.
Possible Variations
We heard you love the versatility of our cherry pie recipe, so here are a few variations to try.
Add Almond Extract: Nona Antinori suggests, "It's so easy and adds so much flavor! I add 1/2 teaspoon of almond extract to the cherries."
Decorate the Top Crust: Nona Antinori also shares, "I use cookie cutters on the top crust to create a fun, customized look. It's perfect for any time of year!"
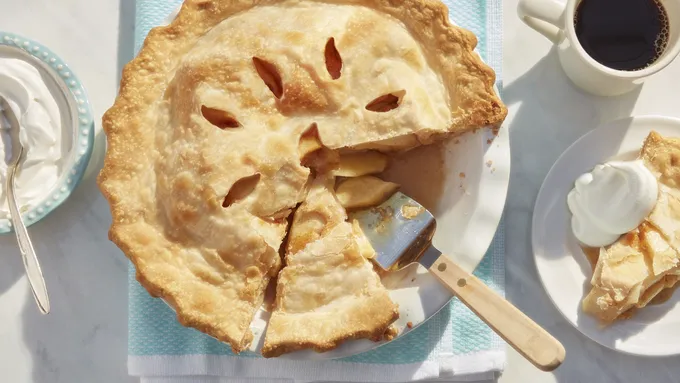
Fresh Cherry Pie: For a truly classic experience, make the best cherry pie recipe from scratch like our original recipe, using fresh sour cherries and a few additional ingredients.
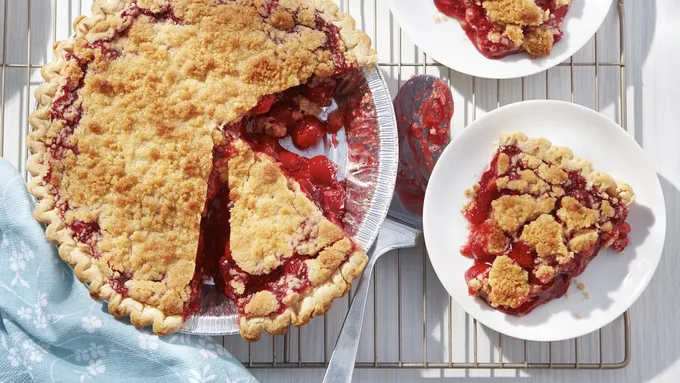
For a cherry pie recipe with a completely different top crust, try this streusel-topped Cherry Crumb Pie.
Cherry Pie Toppings
Here are some of our favorite ways to top a slice of this best cherry pie recipe-from simple to over the top.
Whipped Cream: A dollop of whipped cream balances the tart cherry filling. You can use homemade whipped cream, an aerosol can, or frozen (thawed) whipped topping.
Ice Cream: Vanilla ice cream pairs wonderfully with cherry pie, or try fun flavors like butter pecan, coffee, or chocolate chip.
Garnishes: Add a cherry on top or a festive sugar cookie for a special touch, or sprinkle with chopped nuts or candy bars.
Storing and Reheating
Here are the best methods we've tested for storing your pie.
Room Temperature
Cover pie plate with plastic wrap or aluminum foil for up to 2 days.
Refrigerator
Cover pie plate with plastic wrap or aluminum foil for up to 4 days.
Freezer
• Freezing Baked Pie: Let the pie cool completely. Freeze uncovered until frozen, about 2 to 3 hours; then, remove from the pie plate by gently tipping it onto a surface. Tightly wrap pie without plate in plastic wrap and foil; then, tightly seal in a freezer bag or freezer-safe container to freeze for up to 4 months. Note: Do not store in freezer in a glass pie plate, which can crack from extreme temperature changes.
• Freezing Unbaked Pie: Freeze unbaked pie uncovered until frozen, about 2 to 3 hours. Remove from pie plate, wrap, and store as directed for a baked pie.
Reheating
• Refrigerated Baked Pie: Heat a slice in the microwave for 5 to 10 seconds on High (100%) or until warmed.
• Frozen Baked Pie: Unwrap and place frozen pie in a glass pie plate. Let thaw at room temperature for about an hour on a cooling rack. Bake the partially thawed pie at 375°F for 35 to 45 minutes or until warm.
• Frozen Unbaked Pie: Unwrap and place frozen pie in a glass pie plate. Bake at 425°F for 15 minutes. Then, reduce the oven temperature to 375°F, and bake for another 30 to 45 minutes or until the filling begins to bubble through the crust slits.
Why Pillsbury Users Love This Recipe
Our cherry pie recipe is a favorite among home bakers for its simplicity and consistently delicious results. Easy enough for beginners, yet satisfying enough for experienced cooks, the perfectly balanced flavors keep everyone coming back for more. Many users enjoy customizing the recipe with additions like almond extract or lemon juice, showcasing its versatility. The convenience of using pre-made Pillsbury™ Pie Crust—renowned for its flakiness and ease of use—makes this recipe even more appealing.
As Thom2266 shared, "Absolutely excellent pie, you can never fail following a Pillsbury recipe. I go to their recipes all the time. My cherry pie turned out amazing, I love it thank you Pillsbury!" This sentiment reflects the consistent success our users experience, creating a delicious pie every time, perfect for any occasion—from holiday gatherings to everyday treats.
Frequently Asked Questions
Watch Video
Cherry Pie
- Prep Time 25 min
- Total 1 hr 10 min
- Ingredients 4
- Servings 8
Ingredients
- 1 box (14.1 oz) refrigerated Pillsbury™ Pie Crusts (2 Count), softened as directed on box
- 2 cans (21 oz each) cherry pie filling
- 1 teaspoon milk
- 1 teaspoon sugar
Instructions
-
Step1
Bring crusts to room temperature by removing outer package and placing on your counter for 15 minutes. Place oven rack in the center of oven. Heat oven to 425°F.
-
Step2
Place 1 pie crust in ungreased 9-inch glass pie plate. Press crust firmly against side and bottom, allowing any extra crust to hang over the edge.
-
Step3
Spoon cherry pie filling into the prepared crust-lined pie plate. Spread the filling evenly.
-
Step4
Place the second crust over the cherry filling. Fold the excess top crust under the bottom crust edge, pressing the edges together to seal and form a thick rim.
-
Step5
Flute the edge of the pie crust by placing your thumb and index finger about 1 inch apart on the outside edge. Use your other index finger to push the pastry outward, forming a scalloped edge.
-
Step6
Using a pastry brush, brush milk to cover the top crust, then sprinkle evenly with sugar.
-
Step7
With a small knife, cut slits or shapes in several places on the top crust to allow steam to escape while baking.
-
Step8
Bake the pie for 15 minutes. Cover the edges of the crust with foil to prevent excessive browning. Continue baking for an additional 25 to 30 minutes, or until the filling begins to bubble through the crust’s slits and the crust is golden brown.
-
Step9
Cool on cooling rack at least 1 hour before serving. Cut into slices and serve.
Nutrition
Nutrition Facts
Serving Size: 1 Serving
- Calories
- 380
- Calories from Fat
- 110
- Total Fat
- 12g
- 19%
- Saturated Fat
- 5g
- 25%
- Trans Fat
- 0g
- Cholesterol
- 5mg
- 2%
- Sodium
- 260mg
- 11%
- Potassium
- 160mg
- 5%
- Total Carbohydrate
- 65g
- 22%
- Dietary Fiber
- 2g
- 8%
- Sugars
- 30g
- Protein
- 2g
% Daily Value*:
- Vitamin A
- 4%
- 4%
- Vitamin C
- 2%
- 2%
- Calcium
- 0%
- 0%
- Iron
- 2%
- 2%
Exchanges:
1 Starch; 1/2 Fruit; 3 Other Carbohydrate; 0 Skim Milk; 0 Low-Fat Milk; 0 Milk; 0 Vegetable; 0 Very Lean Meat; 0 Lean Meat; 0 High-Fat Meat; 2 Fat;Carbohydrate Choice
4Tips from the
Pillsbury Kitchens
- tip 1
- tip 2
- tip 3
- tip 4