Recipe Ingredients
Only a few simple ingredients are needed for this easy apple pie.
Apples: Our go-to choice is Granny Smith apples for that classic apple pie taste. Avoid any that are soft, mushy, or blemished.
Pie Crusts: Use refrigerated Pillsbury™ Pie Crusts, to get homemade apple pie in less time. Or go to our Scratch Pie Crust How To if you want a homemade option.
Sugar: We use granulated sugar for the right amount of sweetness in the apple pie filling. Brown sugar can also be swapped in for a richer, slightly molasses flavor.
Spices: Ground cinnamon and nutmeg round out the filling’s flavor profile. You can switch things up by adding ground ginger for a little zip or swapping in apple pie spice for ease.
Flour: This thickens the apple pie filling as it bakes, absorbing apple juices and preventing a soggy bottom crust. Since apples are high in pectin and release little juice, only a small amount of thickener is needed. We prefer flour, as it's a common pantry staple, but you can also use cornstarch—just use half the amount of cornstarch as you would flour.
Lemon Juice: Just a splash balances out the sweetness.
The Best Apples for Apple Pie
It can be confusing to know which apple varieties make the best apple pie, so we’ve done the testing for you, and these are our picks, along with one to avoid.
Granny Smith: Tart, juicy, firm, and hold their shape while baking. It’s the choice for us to bake pies, tarts, and other baked goods. They’re available year-round and easy to find.
Honeycrisp: Sweet, crisp, and juicy, Honeycrisp apples offer a satisfying crunch that holds up perfectly in the oven. Their balanced flavor creates a pie that’s neither too sweet nor too tart.
Gala: Known for their mild sweetness and crisp texture, Gala apples are a great year-round choice for pies.
Golden Delicious: If you prefer a softer apple pie with a mild, natural sweetness, Golden Delicious apples are for you.
Not-So-Great Option—Red Delicious: While popular for snacking, they’re not ideal for apple pie. These apples tend to be soft and mealy, breaking down and becoming mushy in the oven. They also lack the tartness needed to balance the richness of the pie filling.
Cookware You’ll Need
9-inch Glass Pie Plate: After testing different options, we recommend a heat-resistant glass pie plate. It ensures an evenly-baked crust and prevents overbrowning. Plus, you can easily check how the bottom crust is browning.
Large Bowl: A large mixing bowl is key for plenty of room to stir the filling, evenly combining ingredients.
Vegetable Peeler: Use to easily remove just the apple peel without the apple flesh.
Aluminum Foil: Over the years, this simple trick has become one of the few tweaks we’ve made to our apple pie recipe: Simply wrap the crust edges with foil to prevent overbrowning. Use strips about 3 inches wide. Or cut a square piece of foil large enough to cover the whole pie, then cut out a hole in the center the size of the pie. Place it over the pie so the edges are covered, but the center remains exposed for browning. If you see the top is browning too quickly, cover the entire pie.
Cooling Rack: Helps your pie evenly cool and prevents the bottom crust from getting soggy.
How to Make Apple Pie
1. Place Crust in Pie Plate
Let the crusts sit out at room temperature for about 15 minutes to soften. Straight from the fridge they could crack; if left out too long, they could become sticky and hard to use. Gently unroll—if not unrolling easily, let it soften for a few more minutes. Place 1 crust into the bottom of the pie plate, and firmly press it to bottom and up the sides.
2. Peeling and Cutting the Apples
Start by washing them thoroughly. Peel the apples using a vegetable peeler or a sharp paring knife. Begin at the stem end and circle around to the blossom end to remove all the peel. We prefer a peeler because it's quick and helps avoid removing too much flesh, which can happen with a knife if you're in a hurry. Slice the apple into quarters, then cut about 1/4-inch thick, even slices for uniform baking.
3. Make the Filling
Toss apples with all the filling ingredients to fully coat.
4. Fill and Seal
Spoon filling into bottom crust. Carefully center and place the second softened crust over the filling. Flute your pie by pressing the top crust under the bottom crust all around the edges to tightly seal. Pinch the raised edge between your thumb and forefinger, creating a scalloped pattern. Cut several small slits in the top crust with a small knife to release steam while baking.
5. Bake and Cover
Bake uncovered for 15 minutes to begin browning. Then, cover the crust edges with foil to prevent overbrowning while allowing the crust top to continue browning. At 40 minutes, check for doneness by inserting a paring knife into one of the slits. If there’s resistance, bake a little longer. If the knife slides easily through the apple slice, your pie is done.
Possible Variations
We’ve heard that you’re always looking for creative ways to make apple pie, and we’ve got a few variations to try.
Caramel Apple Pie: Our State Fair winner with a classic lattice-crust top and easy caramel apple dip for extra flavor decadence!
Dutch Apple Pie: A family favorite and hit at potlucks and holiday gatherings. Ultra-easy to make thanks to a single pie crust.
Apple Slab Pie: Our apple pie recipe reimagined to feed a crowd.
Mini Apple Pies: Fun, bite-sized versions of the classic dessert.
From Ahuker, a longtime recipe user: “I've made this pie for years never had any problems and it's been delicious. I do use half brown sugar half white sugar. I always use about 9 apples 7 Macintosh and 2 granny Smiths. Make sure to cook it long enough so all apples are soft. My family loves this recipe.”
We know planning Thanksgiving desserts can be a little overwhelming, but we’ve got you covered. Now that you've mastered this easy apple pie recipe, don’t forget about pumpkin pie. Our Easiest-Ever Pumpkin Pie pairs perfectly with other fall desserts and is a guaranteed crowd-pleaser.
Serving Apple Pie
Here are some of our favorite ways to top a slice of homemade apple pie and take it to the next level.
Ice Cream: Our favorite way to enjoy apple pie is à la mode–served with a scoop of vanilla ice cream. Or try caramel, butter pecan, cinnamon, or maple for a twist.
Whipped Cream: A dollop of whipped cream enhances the tangy apple pie filling and flaky crust.
Caramel: Drizzling your pie with caramel topping adds a rich, velvety layer. We like to sprinkle coarse sea salt on top to make the caramel taste extra rich and buttery.
Nuts: Sprinkling crushed or chopped pecans, walnuts, almonds, or pistachios on top adds a satisfying crunch to your pie.
Sharp Cheddar Cheese: The salty, sharp taste of cheddar cheese complements the flaky crust and sweet apple filling. Melt a slice on top or serve a cold slice on the side.
Storing and Reheating
After plenty of testing, we’ve perfected the best ways to store your pie.
Room Temperature
Cover with plastic wrap or aluminum foil; it will keep for up to 2 days.
Refrigerator
If your pie has been sitting out for a couple of days, store it in the fridge for up to 2 more days to keep it fresh.
Reheating
Heat a slice in the microwave for 5-10 seconds on High (100%) on a microwave-safe plate.
Freezer
• Freezing baked pie: Cool your pie completely, place in freezer uncovered until frozen, and remove from pan by tipping to the side and sliding out. Wrap tightly in plastic wrap or foil and seal it in a 2-gallon freezer bag for up to 4 months. Important note: We don’t recommend freezing a pie in a glass pie plate, as glass can crack from extreme temperature changes.
• Freezing unbaked pie: Place in freezer uncovered until frozen and remove by tipping to the side to slide out. Wrap tightly in plastic wrap or foil and seal it in a 2-gallon freezer bag for up to 4 months.
• Baking frozen unbaked pie: Remove from the freezer and place in a glass pie plate. Bake at 425°F until apples are tender. It may take about 10 to 15 minutes longer than the recipe calls for.
• Baking frozen baked pie: Remove from the freezer and place in a glass pie plate. Let it thaw at room temperature for about an hour. We recommend placing the pie on a cooling rack to help it evenly thaw. Bake the partially-thawed pie at 375°F for 35 to 45 minutes, or until warm.
Why Pillsbury Users Love This Recipe
This apple pie recipe has won the hearts of over 800 reviewers—and counting—with many calling it the best they’ve ever had. It’s simple, easy to make, and ideal for first-time bakers, yet versatile enough for those who love to add their own personal touch—whether it's different apples, homemade crusts, or a dash of vanilla. A true crowd-pleaser, this pie disappears quickly at gatherings and is always a hit with family and friends.
Helpful tips, like using foil to prevent burning and brushing the crust with egg white for extra crispiness, make it even better. With consistently perfect results and the added bonus of being allergen-friendly, this recipe has become a go-to for many. Whether you're baking it for the first time or refining it for a special occasion, this apple pie is sure to warm your heart and impress everyone who gets a slice.
Frequently Asked Questions
Can I Make This Apple Pie Ahead of Time?
Yes, you can! You can either bake the pie in advance or prepare it unbaked and freeze it for later. For a baked pie, cool it completely, freeze until solid, then wrap and store it. For an unbaked pie, freeze it uncovered until firm, then wrap and store. When ready to bake or serve, simply thaw or reheat as needed for a delicious, fresh-tasting pie anytime. Keep in mind that freezing a pie in a glass pie plate is not recommended as glass may crack due to extreme temperature changes.
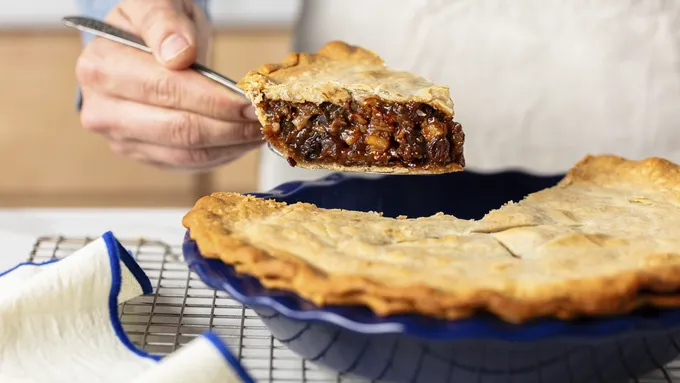
How Should I Cut My Homemade Apple Pie?
For the sturdiest slices, let your apple pie cool for at least 2 hours to allow the filling to set. Use a sharp serrated knife for clean cuts and lift slices with a pie or cake server (triangular-shaped spatula). Wiping your knife between slices helps keep the crust from mixing into the filling.
How Do I Prevent Soggy Apple Pie?
A final flaky pie crust starts with using the right pan. Refrigerated pie crusts, like the ones we use in this recipe, should be baked in heat-resistant glass pie plates. We don’t recommend shiny or disposable pie pans, as they reflect heat and can prevent the crust from browning properly. Using the right size and type of pie plate, the right amount of filling, and baking until the crust is golden brown will help prevent a soggy bottom.
(function() {
document.addEventListener('DOMContentLoaded', function() {
var componentMetadata = JSON.parse('\x7b\x22componentName\x22\x3a\x22RecipeFAQ_e8af84a8-5198-47ca-bc1c-daf22247ecf7\x22,\x22deferOptions\x22\x3a\x7b\x22deferComponent\x22\x3afalse,\x22deferType\x22\x3a\x22None\x22,\x22deferId\x22\x3a\x22ra94683f8113343ad9d7e43a724dce5cb\x22,\x22deferredContainerId\x22\x3a\x22\x2fmain\x2frdpFAQ\x22,\x22deferredContainerView\x22\x3anull\x7d,\x22viewName\x22\x3a\x22RecipeFAQ\x22\x7d');
var configuration = {"title":"Perfect Apple Pie","introduction":"\u003cp\u003eThis classic apple pie recipe, a longtime favorite from Pillsbury, originated in the 1963 The Pillsbury Family Cook Book. Over the years, the ingredients evolved slightly, upping the ground cinnamon and adding nutmeg while removing the lemon rind and butter for perfectly balanced flavor, resulting in the top-rated and highly viewed version we know today. We introduced the option to use refrigerated pie crust instead of making a scratch pie crust, making it even easier to enjoy this beloved dessert. Featured in numerous cookbooks, including Pillsbury Best Desserts, Pillsbury Complete Cookbook, Dough Magic!, and Pillsbury Easy as Pie, it’s no wonder this apple pie has become a family favorite.\u003c/p\u003e\u003cp\u003eWe think it’s the best, using simple ingredients you probably have in your kitchen, and made easy with Pillsbury™ Pie Crusts. It’s as simple as 1-2-3: unroll, fill, top, and bake. With just 30 minutes of prep, you’ll have a cozy, crowd-pleasing dessert ready to enjoy in about 3 hours.\u0026nbsp;\u003c/p\u003e","servingSize":"1 Serving","image":{"small":{"media":"(min-width: 0px)","src":"https://mojo.generalmills.com/api/public/content/RF7rt2cyH0GGi0OySrmZnQ_webp_base.webp?v=5c8faeb0\u0026t=e724eca7b3c24a8aaa6e089ed9e611fd"},"medium":{"media":"(min-width: 500px)","src":"https://mojo.generalmills.com/api/public/content/RF7rt2cyH0GGi0OySrmZnQ_webp_base.webp?v=5c8faeb0\u0026t=191ddcab8d1c415fa10fa00a14351227"},"large":{"media":"(min-width: 767px)","src":"https://mojo.generalmills.com/api/public/content/RF7rt2cyH0GGi0OySrmZnQ_webp_base.webp?v=5c8faeb0\u0026t=191ddcab8d1c415fa10fa00a14351227"},"alt":"Perfect Apple Pie"},"contributor":{"label":"By","name":"Pillsbury Kitchens","profileUrl":"/about-us","displayDate":{"label":"Updated","date":"Mar 10, 2025"}},"ingredientGroups":[{"name":"Crust","ingredients":[{"quantity":"1","description":"box (14.1 oz) refrigerated Pillsbury™ Pie Crusts (2 Count), softened as directed on box","productLink":"/products/pie-crust/refrigerated-pie-crust"}]},{"name":"Filling (see Tip 2 for shortcut)","ingredients":[{"quantity":"6","description":"medium-sized apples (2 lb)"},{"quantity":"3/4","description":"cup sugar"},{"quantity":"2","description":"tablespoons all-purpose flour"},{"quantity":"3/4","description":"teaspoon ground cinnamon"},{"quantity":"1/4","description":"teaspoon salt"},{"quantity":"1/8","description":"teaspoon ground nutmeg"},{"quantity":"1","description":"tablespoon lemon juice"}]}],"steps":[{"description":"\u003cp\u003eBring crusts to room temperature by removing outer package and placing on your counter for 15 minutes.\u0026nbsp;Place oven racks in middle and lower positions. Place a large piece of heavy-duty foil on the lower oven rack to catch any juices. Heat\u0026nbsp;oven to 425°F.\u003c/p\u003e"},{"description":"\u003cp\u003eMeanwhile, wash and peel the apples using a vegetable\u0026nbsp;peeler or a sharp paring knife. Slice the apples into\u0026nbsp;quarters, then cut thin (about 1/4-inch thick), even slices (about 6 cups total).\u003c/p\u003e"},{"description":"\u003cp\u003ePlace 1 pie crust in ungreased 9-inch glass pie plate. Press crust firmly against side and bottom, allowing any extra crust to hang over the edge.\u003c/p\u003e","stepShotImageUrl":"//mojo.generalmills.com/api/public/content/kIdVqPL1qkejri-OIveEfw_webp_base.webp?v=4c834f85\u0026t=51a43a57af4046789e5a7f20567b1195"},{"description":"\u003cp\u003eIn large bowl, gently mix apples, sugar, flour, cinnamon, salt, nutmeg and lemon juice until apples are evenly coated. Spoon filling into crust-lined pie plate.\u003c/p\u003e"},{"description":"\u003cp\u003ePlace second crust over the apple mixture. Fold excess top crust under the edge of the bottom crust, pressing edges together to seal and create a thick rim.\u003c/p\u003e"},{"description":"\u003cp\u003eFlute the edge of the pie crust by placing your thumb and index finger about 1 inch apart on the outside edge. With your other index finger, push the pastry toward the outside to form a scalloped edge.\u003c/p\u003e","stepShotImageUrl":"//mojo.generalmills.com/api/public/content/66_YEiRfbkCVGqjAcvUK5g_webp_base.webp?v=4aa647ea\u0026t=51a43a57af4046789e5a7f20567b1195"},{"description":"\u003cp\u003eWith a small knife, cut slits or shapes in several places in top crust to allow steam to escape while baking.\u003c/p\u003e"},{"description":"\u003cp\u003eBake pie on middle oven rack for 15 minutes. Cover edge of crust with 2- to 3-inch-wide strips of foil to prevent excessive browning. Bake an additional 25 to 30 minutes or until apples are tender when pierced with the tip of a knife and crust is golden brown.\u003c/p\u003e","stepShotImageUrl":"//mojo.generalmills.com/api/public/content/S96P9_ldZUOpdjooojjZIA_webp_base.webp?v=e57f5eed\u0026t=51a43a57af4046789e5a7f20567b1195"},{"description":"\u003cp\u003eCool on cooling rack at least 2 hours before serving. Cut into slices and serve.\u003c/p\u003e"}],"tips":[{"title":"","description":"Try our easy apple pie recipe with perfectly spiced fresh apple filling and Pillsbury™ Pie Crusts–a warm, classic dessert perfect for any occasion.","category":"Rich Snippet"},{"title":"","description":"\u003cp\u003eFlour is the key ingredient that helps turn the apple juices into a spiced, thick sauce as the pie bakes. We like to mix the sugar, spices, and flour in a small bowl first—though we know it means washing another bowl—before adding it to the apple slices. This ensures everything is evenly combined, with no clumps, and that each piece is coated with equal amounts of flavor.\u003c/p\u003e","category":"Substitution"},{"title":"","description":"\u003cp\u003eIf you\u0027re short on time, use two cans (21-oz each) of More Fruit apple pie filling, found in the baking aisle’s canned fruit filling section. This type of pie filling has more apples and less syrup, offering a more fruit-forward flavor. Go ahead and skip adding the flour and reduce or eliminate the sugar. Taste the filling to see if you\u0027d like to adjust sugar or spice levels. Baking time will need adjusting, so keep an eye on it and watch for the crust to be golden brown.\u003c/p\u003e","category":"Substitution"},{"title":"","description":"\u003cp\u003eWe know it’s tempting, but cutting into your apple pie too early can cause it to collapse and ooze, so be patient. As it cools, the filling will thicken and set, making it much easier to slice. We like to give our apple pie a good 2 hours on the cooling rack before slicing into it.\u003c/p\u003e","category":"Method Note"},{"title":"","description":"Recipe meets Kitchen Tested criteria. Reviewed as part of project MSO-5941 BC Audit 200 recipes","category":"Kitchen Tested"}],"kitchenTips":[{"title":"","description":"\u003cp\u003eFlour is the key ingredient that helps turn the apple juices into a spiced, thick sauce as the pie bakes. We like to mix the sugar, spices, and flour in a small bowl first—though we know it means washing another bowl—before adding it to the apple slices. This ensures everything is evenly combined, with no clumps, and that each piece is coated with equal amounts of flavor.\u003c/p\u003e","category":"Substitution"},{"title":"","description":"\u003cp\u003eIf you\u0027re short on time, use two cans (21-oz each) of More Fruit apple pie filling, found in the baking aisle’s canned fruit filling section. This type of pie filling has more apples and less syrup, offering a more fruit-forward flavor. Go ahead and skip adding the flour and reduce or eliminate the sugar. Taste the filling to see if you\u0027d like to adjust sugar or spice levels. Baking time will need adjusting, so keep an eye on it and watch for the crust to be golden brown.\u003c/p\u003e","category":"Substitution"},{"title":"","description":"\u003cp\u003eWe know it’s tempting, but cutting into your apple pie too early can cause it to collapse and ooze, so be patient. As it cools, the filling will thicken and set, making it much easier to slice. We like to give our apple pie a good 2 hours on the cooling rack before slicing into it.\u003c/p\u003e","category":"Method Note"}],"additionalContent":[{"title":"Recipe Ingredients ","description":"\u003cp\u003eOnly a few simple ingredients are needed for this easy apple pie.\u003c/p\u003e\u003cp\u003e\u003cstrong\u003eApples:\u003c/strong\u003e Our go-to choice is Granny Smith apples for that classic apple pie taste.\u0026nbsp; Avoid any that are soft, mushy, or blemished.\u0026nbsp;\u0026nbsp;\u003c/p\u003e\u003cp\u003e\u003cstrong\u003ePie Crusts:\u003c/strong\u003e Use \u003ca href=\u0022https://www.pillsbury.com/products/pie-crust/refrigerated-pie-crust\u0022\u003erefrigerated Pillsbury™ Pie Crusts\u003c/a\u003e, to get homemade apple pie in less time. Or go to our \u003ca href=\u0022https://www.pillsbury.com/everyday-eats/desserts/pies-tarts/how-to-make-pie-crust-from-scratch\u0022\u003eScratch Pie Crust How To\u003c/a\u003e if you want a homemade option.\u003c/p\u003e\u003cp\u003e\u003cstrong\u003eSugar:\u003c/strong\u003e We use granulated sugar for the right amount of sweetness in the apple pie filling. Brown sugar can also be swapped in for a richer, slightly molasses flavor.\u003c/p\u003e\u003cp\u003e\u003cstrong\u003eSpices:\u003c/strong\u003e Ground cinnamon and nutmeg round out the filling’s flavor profile. You can switch things up by adding ground ginger for a little zip or swapping in apple pie spice for ease.\u003c/p\u003e\u003cp\u003e\u003cstrong\u003eFlour:\u003c/strong\u003e This thickens the apple pie filling as it bakes, absorbing apple juices and preventing a soggy bottom crust. Since apples are high in pectin and release little juice, only a small amount of thickener is needed. We prefer flour, as it\u0027s a common pantry staple, but you can also use cornstarch—just use half the amount of cornstarch as you would flour.\u003c/p\u003e\u003cp\u003e\u003cstrong\u003eLemon Juice:\u003c/strong\u003e Just a splash balances out the sweetness.\u0026nbsp;\u003c/p\u003e","category":"SEO Content_1"},{"title":"The Best Apples for Apple Pie","description":"\u003cp\u003eIt can be confusing to know which apple varieties make the best apple pie, so we’ve done the testing for you, and these are our picks, along with one to avoid.\u003c/p\u003e\u003cp\u003e\u003cstrong\u003eGranny Smith:\u003c/strong\u003e Tart, juicy, firm, and hold their shape while baking. It’s the choice for us to bake pies, tarts, and other baked goods. They’re available year-round and easy to find.\u003c/p\u003e\u003cp\u003e\u003cstrong\u003eHoneycrisp:\u003c/strong\u003e Sweet, crisp, and juicy, Honeycrisp apples offer a satisfying crunch that holds up perfectly in the oven. Their balanced flavor creates a pie that’s neither too sweet nor too tart.\u003c/p\u003e\u003cp\u003e\u003cstrong\u003eGala:\u003c/strong\u003e Known for their mild sweetness and crisp texture, Gala apples are a great year-round choice for pies.\u003c/p\u003e\u003cp\u003e\u003cstrong\u003eGolden Delicious:\u003c/strong\u003e If you prefer a softer apple pie with a mild, natural sweetness, Golden Delicious apples are for you.\u003c/p\u003e\u003cp\u003e\u003cstrong\u003eNot-So-Great Option—Red Delicious:\u003c/strong\u003e While popular for snacking, they’re not ideal for apple pie. These apples tend to be soft and mealy, breaking down and becoming mushy in the oven. They also lack the tartness needed to balance the richness of the pie filling.\u003c/p\u003e","category":"SEO Content_2"},{"title":"Cookware You’ll Need","description":"\u003cp\u003e\u003cstrong\u003e9-inch Glass Pie Plate:\u003c/strong\u003e After testing different options, we recommend a heat-resistant glass pie plate. It ensures an evenly-baked crust and prevents overbrowning. Plus, you can easily check how the bottom crust is browning.\u003c/p\u003e\u003cp\u003e\u003cstrong\u003eLarge Bowl:\u003c/strong\u003e A large mixing bowl is key for plenty of room to stir the filling, evenly combining ingredients.\u003c/p\u003e\u003cp\u003e\u003cstrong\u003eVegetable Peeler: \u003c/strong\u003eUse to easily remove just the apple peel without the apple flesh.\u003c/p\u003e\u003cp\u003e\u003cstrong\u003eAluminum Foil: \u003c/strong\u003eOver the years, this simple trick has become one of the few tweaks we’ve made to our apple pie recipe: Simply wrap the crust edges with foil to prevent overbrowning. Use strips about 3 inches wide. Or cut a square piece of foil large enough to cover the whole pie, then cut out a hole in the center the size of the pie. Place it over the pie so the edges are covered, but the center remains exposed for browning. If you see the top is browning too quickly, cover the entire pie.\u003c/p\u003e\u003cp\u003e\u003cstrong\u003eCooling Rack:\u003c/strong\u003e Helps your pie evenly cool and prevents the bottom crust from getting soggy.\u003c/p\u003e","category":"SEO Content_3"},{"title":"How to Make Apple Pie","description":"\u003ch3\u003e\u003cstrong\u003e1. Place Crust in Pie Plate\u003c/strong\u003e\u003c/h3\u003e\u003cp\u003eLet the crusts sit out at room temperature for about 15 minutes to soften. Straight from the fridge they could crack; if left out too long, they could become sticky and hard to use. Gently unroll—if not unrolling easily, let it soften for a few more minutes. Place 1 crust into the bottom of the pie plate, and firmly press it to bottom and up the sides.\u003c/p\u003e\u003ch3\u003e\u003cstrong\u003e2. Peeling and Cutting the Apples\u003c/strong\u003e\u003c/h3\u003e\u003cp\u003eStart by washing them thoroughly. Peel the apples using a vegetable peeler or a sharp paring knife. Begin at the stem end and circle around to the blossom end to remove all the peel. We prefer a peeler because it\u0027s quick and helps avoid removing too much flesh, which can happen with a knife if you\u0027re in a hurry. Slice the apple into quarters, then cut about 1/4-inch thick, even slices for uniform baking.\u003c/p\u003e\u003ch3\u003e\u003cstrong\u003e3. Make the Filling\u003c/strong\u003e\u003c/h3\u003e\u003cp\u003eToss apples with all the filling ingredients to fully coat.\u003c/p\u003e\u003ch3\u003e\u003cstrong\u003e4. Fill and Seal\u003c/strong\u003e\u003c/h3\u003e\u003cp\u003eSpoon filling into bottom crust. Carefully center and place the second softened crust over the filling. Flute your pie by pressing the top crust under the bottom crust all around the edges to tightly seal. Pinch the raised edge between your thumb and forefinger, creating a scalloped pattern. Cut several small slits in the top crust with a small knife to release steam while baking.\u003c/p\u003e\u003ch3\u003e\u003cstrong\u003e5. Bake and Cover\u003c/strong\u003e\u003c/h3\u003e\u003cp\u003eBake uncovered for 15 minutes to begin browning. Then, cover the crust edges with foil to prevent overbrowning while allowing the crust top to continue browning. At 40 minutes, check for doneness by inserting a paring knife into one of the slits. If there’s resistance, bake a little longer. If the knife slides easily through the apple slice, your pie is done.\u003c/p\u003e","category":"SEO Content_4"},{"title":"Possible Variations ","description":"\u003cp\u003eWe’ve heard that you’re always looking for creative ways to make apple pie, and we’ve got a few variations to try.\u003c/p\u003e\u003cp\u003e\u003ca href=\u0022https://www.pillsbury.com/recipes/caramel-apple-pie/0856535f-aaed-4204-9b3f-8442d5b9330f\u0022\u003e\u003cstrong\u003eCaramel Apple Pie\u003c/strong\u003e\u003c/a\u003e\u003cstrong\u003e:\u003c/strong\u003e Our State Fair winner with a classic lattice-crust top and easy caramel apple dip for extra flavor decadence! \u0026nbsp;\u003c/p\u003e\u003cp\u003e\u003ca href=\u0022https://www.pillsbury.com/recipes/easy-dutch-apple-pie/ba35ecc6-7ad6-4c77-9833-8ce48cfd8bd4\u0022\u003e\u003cstrong\u003eDutch Apple Pie\u003c/strong\u003e\u003c/a\u003e\u003cstrong\u003e:\u003c/strong\u003e A family favorite and hit at potlucks and holiday gatherings. Ultra-easy to make thanks to a single pie crust.\u003c/p\u003e\u003cp\u003e\u003ca href=\u0022https://www.pillsbury.com/recipes/apple-slab-pie/a0ea3012-4111-4650-8f6e-1c7c31c8eb10\u0022\u003e\u003cstrong\u003eApple Slab Pie\u003c/strong\u003e\u003c/a\u003e\u003cstrong\u003e:\u003c/strong\u003e Our apple pie recipe reimagined to feed a crowd.\u003c/p\u003e\u003cp\u003e\u003ca href=\u0022https://www.pillsbury.com/recipes/mini-apple-pies/d4b31ad3-7816-4971-a3f5-37eca7e017f7\u0022\u003e\u003cstrong\u003eMini Apple Pies\u003c/strong\u003e\u003c/a\u003e\u003cstrong\u003e:\u003c/strong\u003e Fun, bite-sized versions of the classic dessert.\u003c/p\u003e\u003cp\u003eFrom Ahuker, a longtime recipe user: “I\u0027ve made this pie for years never had any problems and it\u0027s been delicious. I do use half brown sugar half white sugar. I always use about 9 apples 7 Macintosh and 2 granny Smiths. Make sure to cook it long enough so all apples are soft. My family loves this recipe.”\u003c/p\u003e\u003cp\u003eWe know planning \u003ca href=\u0022https://www.pillsbury.com/holidays-celebrations/thanksgiving/desserts\u0022\u003eThanksgiving desserts\u003c/a\u003e can be a little overwhelming, but we’ve got you covered. Now that you\u0027ve mastered this easy apple pie recipe, don’t forget about pumpkin pie. Our \u003ca href=\u0022https://www.pillsbury.com/recipes/easiest-ever-pumpkin-pie/5793eb83-dca1-45e0-96e1-7f73af9e282f\u0022\u003eEasiest-Ever Pumpkin Pie\u003c/a\u003e pairs perfectly with other fall desserts and is a guaranteed crowd-pleaser.\u003c/p\u003e","category":"SEO Content_5"},{"title":"Serving Apple Pie","description":"\u003cp\u003eHere are some of our favorite ways to top a slice of homemade apple pie and take it to the next level.\u003c/p\u003e\u003cp\u003e\u003cstrong\u003eIce Cream:\u003c/strong\u003e Our favorite way to enjoy apple pie is à la mode–served with a scoop of vanilla ice cream. Or try caramel, butter pecan, cinnamon, or maple for a twist.\u003c/p\u003e\u003cp\u003e\u003cstrong\u003eWhipped Cream: \u003c/strong\u003eA dollop of whipped cream enhances the tangy apple pie filling and flaky crust. \u0026nbsp;\u003c/p\u003e\u003cp\u003e\u003cstrong\u003eCaramel:\u003c/strong\u003e Drizzling your pie with caramel topping adds a rich, velvety layer. We like to sprinkle coarse sea salt on top to make the caramel taste extra rich and buttery.\u003c/p\u003e\u003cp\u003e\u003cstrong\u003eNuts:\u003c/strong\u003e Sprinkling crushed or chopped pecans, walnuts, almonds, or pistachios on top adds a satisfying crunch to your pie.\u003c/p\u003e\u003cp\u003e\u003cstrong\u003eSharp Cheddar Cheese:\u003c/strong\u003e The salty, sharp taste of cheddar cheese complements the flaky crust and sweet apple filling. Melt a slice on top or serve a cold slice on the side.\u003c/p\u003e","category":"SEO Content_6"},{"title":"Storing and Reheating","description":"\u003cp\u003eAfter plenty of testing, we’ve perfected the best ways to store your pie.\u003c/p\u003e\u003ch3\u003e\u003cstrong\u003eRoom Temperature\u003c/strong\u003e\u003c/h3\u003e\u003cp\u003eCover with plastic wrap or aluminum foil; it will keep for up to 2 days.\u003c/p\u003e\u003ch3\u003e\u003cstrong\u003eRefrigerator\u003c/strong\u003e\u003c/h3\u003e\u003cp\u003eIf your pie has been sitting out for a couple of days, store it in the fridge for up to 2 more days to keep it fresh.\u003c/p\u003e\u003ch3\u003e\u003cstrong\u003eReheating\u003c/strong\u003e\u003c/h3\u003e\u003cp\u003eHeat a slice in the microwave for 5-10 seconds on High (100%) on a microwave-safe plate.\u003c/p\u003e\u003ch3\u003e\u003cstrong\u003eFreezer\u003c/strong\u003e\u003c/h3\u003e\u003cp\u003e\u003cstrong\u003e• Freezing baked pie:\u003c/strong\u003e Cool your pie completely, place in freezer uncovered until frozen, and remove from pan by tipping to the side and sliding out. Wrap tightly in plastic wrap or foil and seal it in a 2-gallon freezer bag for up to 4 months. Important note: We don’t recommend freezing a pie in a glass pie plate, as glass can crack from extreme temperature changes.\u003c/p\u003e\u003cp\u003e\u003cstrong\u003e• Freezing unbaked pie: \u003c/strong\u003ePlace in freezer uncovered until frozen and remove by tipping to the side to slide out. Wrap tightly in plastic wrap or foil and seal it in a 2-gallon freezer bag for up to 4 months.\u003c/p\u003e\u003cp\u003e\u003cstrong\u003e• Baking frozen unbaked pie:\u003c/strong\u003e Remove from the freezer and place in a glass pie plate. Bake at 425°F until apples are tender. It may take about 10 to 15 minutes longer than the recipe calls for.\u003c/p\u003e\u003cp\u003e\u003cstrong\u003e• Baking frozen baked pie:\u003c/strong\u003e Remove from the freezer and place in a glass pie plate. Let it thaw at room temperature for about an hour. We recommend placing the pie on a cooling rack to help it evenly thaw. Bake the partially-thawed pie at 375°F for 35 to 45 minutes, or until warm.\u003c/p\u003e","category":"SEO Content_7"},{"title":"Why Pillsbury Users Love This Recipe","description":"\u003cp\u003eThis apple pie recipe has won the hearts of over 800 reviewers—and counting—with many calling it the best they’ve ever had. It’s simple, easy to make, and ideal for first-time bakers, yet versatile enough for those who love to add their own personal touch—whether it\u0027s different apples, homemade crusts, or a dash of vanilla. A true crowd-pleaser, this pie disappears quickly at gatherings and is always a hit with family and friends.\u003c/p\u003e\u003cp\u003eHelpful tips, like using foil to prevent burning and brushing the crust with egg white for extra crispiness, make it even better. With consistently perfect results and the added bonus of being allergen-friendly, this recipe has become a go-to for many. Whether you\u0027re baking it for the first time or refining it for a special occasion, this apple pie is sure to warm your heart and impress everyone who gets a slice.\u003c/p\u003e","category":"SEO Content_8"}],"faq":[{"title":"Can I Make This Apple Pie Ahead of Time?","description":"\u003cp\u003eYes, you can! You can either bake the pie in advance or prepare it unbaked and freeze it for later. For a baked pie, cool it completely, freeze until solid, then wrap and store it. For an unbaked pie, freeze it uncovered until firm, then wrap and store. When ready to bake or serve, simply thaw or reheat as needed for a delicious, fresh-tasting pie anytime. Keep in mind that freezing a pie in a glass pie plate is not recommended as glass may crack due to extreme temperature changes.\u003c/p\u003e","category":"FAQ_1"},{"title":"How Should I Cut My Homemade Apple Pie?","description":"\u003cp\u003eFor the sturdiest slices, let your apple pie cool for at least 2 hours to allow the filling to set. Use a sharp serrated knife for clean cuts and lift slices with a pie or cake server (triangular-shaped spatula). Wiping your knife between slices helps keep the crust from mixing into the filling.\u003c/p\u003e","category":"FAQ_2"},{"title":"How Do I Prevent Soggy Apple Pie?","description":"\u003cp\u003eA final flaky pie crust starts with using the right pan. Refrigerated pie crusts, like the ones we use in this recipe, should be baked in heat-resistant glass pie plates. We don’t recommend shiny or disposable pie pans, as they reflect heat and can prevent the crust from browning properly. Using the right size and type of pie plate, the right amount of filling, and baking until the crust is golden brown will help prevent a soggy bottom.\u003c/p\u003e","category":"FAQ_3"}],"tipCategories":[{"categoryName":"Kitchen Tested","heading":"More About This Recipe","cssClass":"recipePartStory","expandOnInit":false,"expandText":"More +","collapseText":"Less -","expandEventName":"","collapseEventName":"","image":"","tips":[{"title":"","description":"Recipe meets Kitchen Tested criteria. Reviewed as part of project MSO-5941 BC Audit 200 recipes","category":"Kitchen Tested"}],"isExpandable":false},{"categoryName":"Method Note","heading":"","cssClass":"recipePartMethodNote","expandOnInit":false,"expandText":"More +","collapseText":"Less -","expandEventName":"","collapseEventName":"","image":"","tips":[{"title":"","description":"\u003cp\u003eWe know it’s tempting, but cutting into your apple pie too early can cause it to collapse and ooze, so be patient. As it cools, the filling will thicken and set, making it much easier to slice. We like to give our apple pie a good 2 hours on the cooling rack before slicing into it.\u003c/p\u003e","category":"Method Note"}],"isExpandable":false},{"categoryName":"Rich Snippet","heading":"","cssClass":"recipePartMethodNote","expandOnInit":false,"expandText":"More +","collapseText":"Less -","expandEventName":"","collapseEventName":"","image":"","tips":[{"title":"","description":"Try our easy apple pie recipe with perfectly spiced fresh apple filling and Pillsbury™ Pie Crusts–a warm, classic dessert perfect for any occasion.","category":"Rich Snippet"}],"isExpandable":false}],"nutritionInfo":{"configuration":{"showAsTable":false,"noNutritionInformationAvailableMessage":"No nutrition information available for this recipe","poweredByText":"\u003cp\u003eNutrition information for this recipe is estimated using a leading nutrition calculation application, but is an estimate only. Actual nutrition values will vary based on the exact ingredients or brands you may use.\u003c/p\u003e\n\u003ca href=\u0022http://developer.edamam.com\u0022\u003ePowered By \u003cimg src=\u0022-/media/C4F33FD467AB4A3AB59AAC4F6306AB04.ashx\u0022 alt=\u0022Edamam\u0022 /\u003e\u003c/a\u003e","nutritionChartTitle":"Nutrition Facts","nutritionInformationLabel":"Nutrition","servingSizeText":"Serving Size:","dailyValuesDisclaimer":"*Percent Daily Values are based on a 2,000 calorie diet.","percentDailyValueText":"% Daily Value","percentDailyValueFooterTitleText":"% Daily Value*:","exchangeInformationTitleText":"Exchanges:","nutritionFactsExpandText":"More Nutrition","nutritionFactsCollapseText":"Less Nutrition"},"facts":{"carbohydrateChoice":{"amountPercent":"","amountUnits":"3","title":"Carbohydrate Choice"},"vitaminA":{"amountPercent":"0%","amountUnits":"0%","title":"Vitamin A"},"vitaminC":{"amountPercent":"4%","amountUnits":"4%","title":"Vitamin C"},"calcium":{"amountPercent":"0%","amountUnits":"0%","title":"Calcium"},"iron":{"amountPercent":"0%","amountUnits":"0%","title":"Iron"},"protein":{"amountPercent":"","amountUnits":"1g","title":"Protein"},"dietaryFiber":{"amountPercent":"5%","amountUnits":"1g","title":"Dietary Fiber"},"sugars":{"amountPercent":"","amountUnits":"27g","title":"Sugars"},"totalCarbohydrate":{"amountPercent":"14%","amountUnits":"43g","title":"Total Carbohydrate"},"sodium":{"amountPercent":"8%","amountUnits":"200mg","title":"Sodium"},"potassium":{"amountPercent":"2%","amountUnits":"80mg","title":"Potassium"},"cholesterol":{"amountPercent":"0%","amountUnits":"0mg","title":"Cholesterol"},"transFat":{"amountPercent":"","amountUnits":"0g","title":"Trans Fat"},"saturatedFat":{"amountPercent":"13%","amountUnits":"2 1/2g","title":"Saturated Fat"},"totalFat":{"amountPercent":"9%","amountUnits":"6g","title":"Total Fat"},"caloriesFromFat":{"amountPercent":"","amountUnits":"60","title":"Calories from Fat"},"calories":{"amountPercent":"","amountUnits":"230","title":"Calories"}},"servingSize":"1 Serving","exchangeInfo":"1 Starch; 1/2 Fruit; 1 1/2 Other Carbohydrate; 0 Skim Milk; 0 Low-Fat Milk; 0 Milk; 0 Vegetable; 0 Very Lean Meat; 0 Lean Meat; 0 High-Fat Meat; 1 Fat;","showPoweredBy":false,"showRecipeTotalTime":true,"showRecipePrepTime":true,"showCarbohydrateChoices":true},"trademarks":[],"labels":{"ingredientsHeader":"Ingredients","stepsHeader":"Instructions","stepsImageHideText":"Hide Images","stepsImageShowText":"Show Images","stepNumberText":"Step","faqHeader":"Frequently Asked Questions","tipsHeader":"\u003cp class=\u0022textFirst\u0022\u003eTips from the\u003c/p\u003e\n\u003cp class=\u0022textSecond\u0022\u003ePillsbury Kitchens\u003c/p\u003e","tipItemHeadingFormat":"tip {0}","postedBy":"By","copyright":"© {yyyy} ®/TM General Mills All Rights Reserved","showDrawerText":"Show","hideDrawerText":"Hide","expandDescriptionText":"More +","collapseDescriptionText":"Less -","ariaLiveLabelFormat":"Showing {0} through {1} of {2}","scrollLeftButtonLabel":"Scroll Left","scrollRightButtonLabel":"Scroll Right","includeScrollIndicator":false},"primaryAttributes":[{"label":"Prep Time","values":[{"text":"30","label":"min"}]},{"label":"Total","values":[{"text":"3","label":"hr"},{"text":"0","label":"min"}]},{"label":"Ingredients","values":[{"text":"8"}]},{"label":"Servings","values":[{"text":"8"}]}],"secondaryAttributes":[],"badges":[{"badgeType":3,"badgeText":"","label":"Kitchen Tested","imageUrl":"/-/media/GMI/Core-Sites/PB/Images/Shared/RecipeParts/KitchenTested_PB1_new.jpg?sc_lang=en","linkUrl":"/about-us/kitchen-tested","metaDataTags":[],"showMemberInfo":false,"matchedMetadataId":"00000000-0000-0000-0000-000000000000"},{"badgeType":2,"badgeText":"Pillsbury Pie Crust","label":"Make With","imageUrl":"/-/media/GMI/Core-Sites/PB/PB/Images/Shared/RecipeParts/make-with-logos/MakeWith_100x100_Pillsbury_PieCrust_2.jpg?sc_lang=en","linkUrl":"/products/pie-crust","metaDataTags":["c5de694c-2647-52c1-b9cc-802fa251cffe"],"showMemberInfo":false,"matchedMetadataId":"c5de694c-2647-52c1-b9cc-802fa251cffe"}],"backgroundImageUrl":"","breadcrumbs":{"links":[{"url":"/","label":"Home"},{"url":"/recipes","label":"Recipes"},{"url":"/recipes/dish-type/pies","label":"Best Easy Pie Recipes"}],"currentPageName":"Perfect Apple Pie"}};
var moduleName = 'recipeFaq';
var isVueModule = true;
GeneralMills.PandoSites.RegisterControlInstance(moduleName, configuration, componentMetadata, isVueModule)
});
})();